So, let’s review:
A centerboard is more convenient than a daggerboard, simply because it kicks up when it hits bottom, and can be raised and lowered easily for beaching or sailing in shallow water. But, it’s less convenient because the space it requires is like having and extra person on board who sits right in the middle of the boat and refuses to budge. Compromises can be made to minimize the inconvenience, including changing sail size or position, moving the board forward of optimal balance, increasing weather helm, and/or reducing the size of the board. Any or all can be tweaked to give up more or less cockpit space.
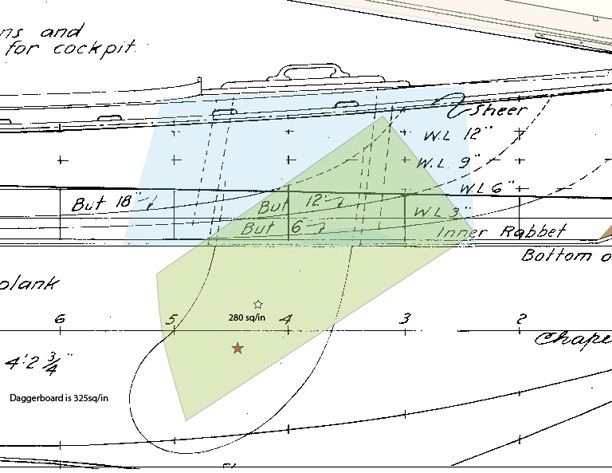
Here’s a diagram of the Crawford centerboard superimposed on the original daggerboard:
The Crawford Centerboard
This arrangement, as mentioned already, produces a very nice boat by making a combination of small concessions – the board is a little smaller and a little farther forward than the original (stars show the Center of Lateral Resistance – the white star is CLR of the Crawford board), the sail is kept modest and positioned well forward, and the case extends about six inches into the cockpit, taking up some space but not much. All in all, one would do well to simply copy this exact design – Crawford has not only done all the work already, but there are several hundred of his boats on the water proving every day that it works well.
I don’t care for video games, crossword puzzles, or Rubik’s Cubes, but I like a good design problem, and have spent many a morning commute wondering if there’s a way to improve on the basic centerboard design. The challenge is to move the case far enough forward that it’s out of the way, but still have it in the right position for sailing when the board is lowered.
I kept looking at the curved daggerboard in the original plans, and thinking what silly brilliance* it was to make the board curved so you could move the case forward. I made a paper cutout, laid it on the plans and played with it, marveling at the simple geometry. Then almost by accident I flipped the board over and laid it on it’s side. Hmm. Playing a little more, I realized that curving the board this other way you could make a centerboard that worked the same magic. I made more cutouts, and even broke up some CDs in their cases to test models, did some drawings, and finally decided to build a prototype.
The basic idea lays a curved daggerboard on it’s side and operates it with a cord, letting it slide back and down over a large curved “hinge pin” which is just the curved bottom of the case. (See the diagram at the top of the page.) For this to work, and for it to still kick up automatically, all the curves have to be perfectly smooth so nothing binds. To cut such big perfect circles I had to make a jig so I could use a router to cut the arcs. I screwed the router base to a board, and screwed the board to the table.
Cutting perfect circles
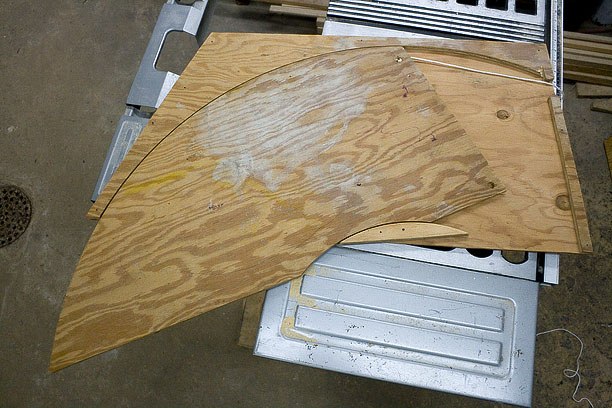
This setup worked great. I started with three identical pieces of plywood, cut to match the profile of the case. Two are used to make the sides of the case. From the third blank I cut the curved board, which gives you the board with the matching spacer and bearing surfaces. Put together, before screwing down the sides of the case, it looks like this:
Inside the Magic Crescent
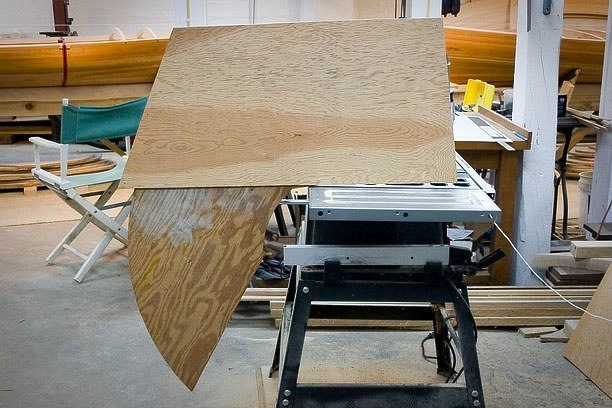
This is what it looks like in action:
Partially lowered.
Fully lowered.
This actually works really, really well. The action is smooth and easy, and it’s very effective at moving the center of the board to the back of the case. It works so well that the case can be moved forward out of the cockpit entirely, leaving it completely open and unobstructed. For reference, here is where the board would be if it were hinge-pinned at the front of the case conventionally, shown in yellow:
In fact, this design is so effective at moving the board rearward in the case that I can’t use it. It moves the CLR of the board so far back that, to have the board large enough and in the right position for the sail, I would have to move the case up under the hatch cover, essentially giving up the forward hatch. Arrgh!
Anyway, the idea is so intriguing I’m posting it here in case someone else can use it. For instance, if you wanted to use a really big sail, like Roger Allen’s gaff rig, you could use this board and position it in the original location, keeping both the open cockpit and the forward hatch; but that sail is probably too big for the typical conditions where I sail. You could also use this on a completely different boat design, since the centerboard-in-the-cockpit problem is pretty universal.
I made one modification to this model after the photos were taken. I converted the bottom arc bearing surface to a simple pin in a curved slot in the board. The only reason I did that is because, without it, the only thing keeping the board from falling through the slot in the bottom of the boat is a cord, and eventually cords break. I prefer having some sort of keeper pin to hold on to the board when that happens.
The only disadvantage I can think of is the tolerances in this model are quite small. If you ever had to replace the board it could be difficult, especially if you didn’t have the original to use as a template. But, you could always make two at once and keep one as a spare, and maybe the tolerances don’t have to be so tight – having a bit more slop in the board/case would work fine.
Nevertheless, I learned enough interesting stuff from this model that I was able to modify it and come up with a final design that does everything I want – keeps the cockpit completely clear, while maintaining the original size and position of the daggerboard.
More on that next.
- *As a side note, when Tom Jones built a Melonseed for John Guidera, he didn’t like the curved board, and he came up with something easier. Instead, he made a straight board, but set the case at a diagonal, angling it back and down. This is easier to build, and allows the board to be shaped in a more efficient foil. The only thing John gives up is a little ease in raising the board from the cockpit, but it makes for a faster boat. Most people put the board all the way down when they sail away from the ramp and leave it there until they come ashore, anyway, so it’s not much extra inconvenience for John. Combined with the ultra thin planking – no thicker than a match stick! – and John’s sailing skill, his boat is very hard to beat. John is usually way out front in any race.
melonseed skiff, mellonseed skiff, melon seed, mellon seed


Hi Barry,
beatiful idiea it’s almost the solution I’ve thinked about, the difference is that I thinked to place a little weel under the centerbord to facilitate the mouvements.
Bye Giuseppe
Tuesday, December 1, 2009 – 12:56 PM
Barry, Thanks for mentioning my Melonseed designed and built by Thomas Firth Jones. His design and build skills, more than my sailing ability, make this such a sweet boat. He devoted a chapter to it in his book”New Plywood Boats”. By design it also has 3″ more freeboard, which makes it drier in choppy conditions.
John Guidera
Tuesday, December 1, 2009 – 03:51 PM
You are a brave man, Barry! Extremely clever. Can’t wait to see it in action!
Tuesday, December 1, 2009 – 04:46 PM
Tony,
Brave . . . or foolish. I won’t know which for a couple of months, so I’ll have all winter to worry about it. 🙂
John, sorry I keep calling your Melonseed a “Tom HIll” design – their names are so similar and both built ultralight plywood boats, and at my age I get confused easily. Fixed it.
Guiseppe, more on the final design soon in the next post, which may answer your question more clearly.
– Barry
Wednesday, December 2, 2009 – 01:41 PM