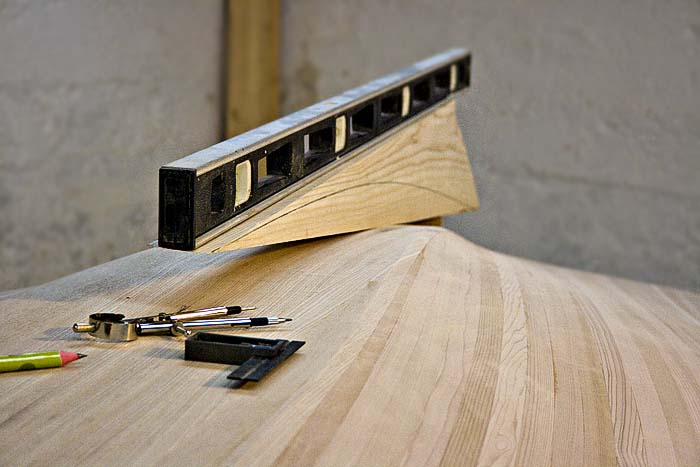
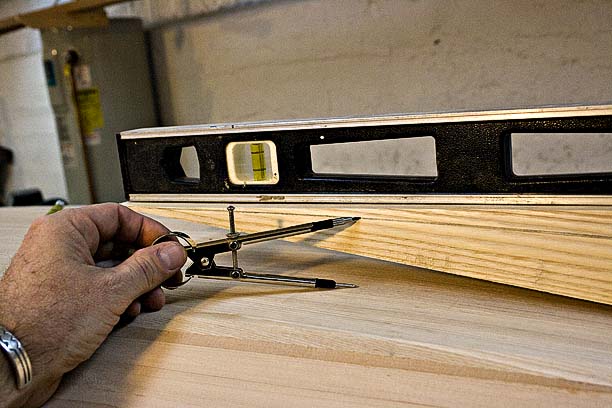
Skeg scribed for cutting
The instructions on the plans for making the skegs consist of the words “Make skegs.” The Barto plans do actually indicate a taper from 1 1/2” down to 1” but that’s about it, leaving quite a bit to the imagination. Took me several days of thinking, and looking at pictures of what others have done, to come with something I thought would work.
I have 2 inch thick slabs of Ash just the right length and width to get out both skegs. Originally, I thought I’d plane them down to 1 1/2”, taper to 1”, and put thick fillets along the seams for strength and flow. I realized I could just taper down from 2” and use a thin fillet instead – stronger and lighter that way (epoxy is heavy and expensive). Water doesn’t like straight lines, so I reasoned this extra thickness would allow for taper front to back in a foil shape, as well as top to bottom.
After cutting out the blanks, the first adventure was using a power planer to do the initial tapers: Shims to the rescue. Then switched to a hand plane.
Next was figuring out how to transfer the curve of the hulls to the blanks with a line I could use to cut to. I’m sure others have done it this way, but in Tony’s photos there’s an image that makes perfect sense for how to go about it. It worked really well.
I rough cut the approximate curves with a saber saw, then took the blanks outside. With my 20 year old Craftman belt sander and a coarse grit belt, I was able to chew them down right to the line for a nice fit.
After a little fine tuning, spread a butter of thickened epoxy on both surfaces and glue them down. A screw and a some weight hold them in place overnight.
In the morning, while the epoxy is still green, a cabinet scraper makes for easy cleanup.
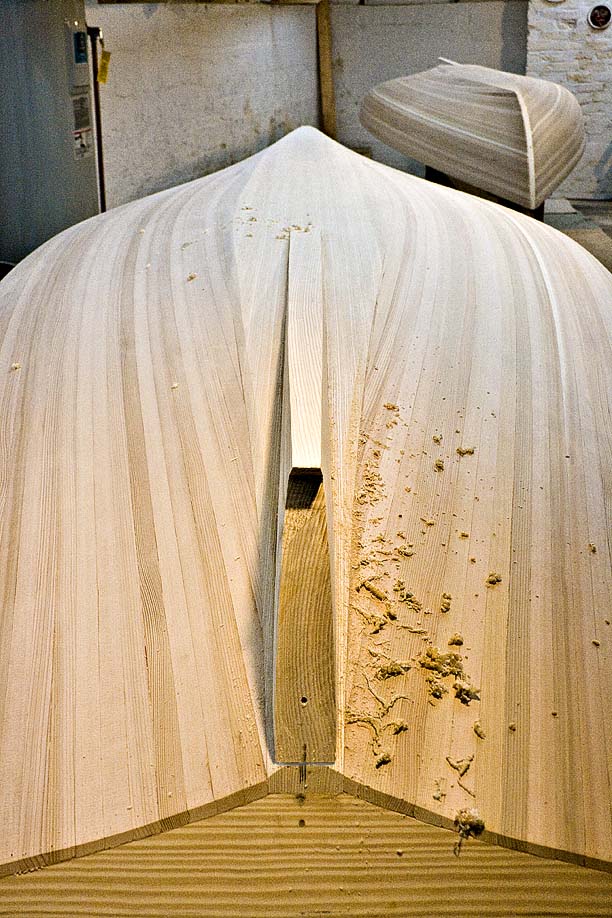
In this picture, you can see the tapers in both directions. A fillet will go in along the seams to smooth the joint just before the hulls are sealed. When the boats are flipped, I’ll run screws through the keel planks into the skegs for strength.
Though the fillets will smooth the transition, I may still do a little more shaping of the trailing edges to ensure a clean line. The Walnut outer transoms will extend past the joint of skeg and hull, and a final piece of ash will fill out the span from there. I left a corner of the skegs along the bottom edge to finish out the run with a miter- this surface gets heavy wear, and leaving any edge or joint exposed here invites oyster bars and stones to rip off pieces of your boat, so better to have the joint on a protected edge. Some people install a gripe along the full length of the hull for this very reason, and I may too. At the very least I’ll run a skid strip of brass from stem to stern.
melonseed skiff, mellonseed skiff, melon seed, mellon seed


Barry,
I am enjoying watching your progress. I have built three strip kayaks using Nick Schad’s book. You should think about publishing your journal in a similar format. I think you’d be surprised how many people would purchase a strip built sailboat book. Anyway, thanks for making this available.
Bob Kimball (Ann Arbor,MI)
Monday, April 20, 2009 – 10:48 PM
Tuesday, July 28, 2009 – 09:24 AM
Hi Bob!
Thanks for the compliment, and glad you’re enjoying it.
Honestly, a whole lot of people know a whole lot more about what they’re doing than I do. But, I can see how watching someone stumble through various problems (rather than doing everything perfectly) would be educational in its own right.
I’m familiar with Nick’s website, he does gorgeous work, but didn’t know he’d written a book, too.
Thinking of building another boat?
Cheers,
Barry
Wednesday, April 22, 2009 – 11:57 PM