(Happy Birthday, T!)
This weekend was all about cutting holes in the hulls for centerboard slots. This is one of those things you only have once chance to get right – no do overs – so it took a lot of time to get up the nerve. Made my mouth dry and my palms sweat. There’s just something instinctively wrong about cutting a hole in the bottom of a boat, buried deep down at the genetic level, like a fear of snakes or spiders; as though our ancestors, who had the good sense to keep such holes out of their boats, thus lived to pass on their genes and a wise aversion to said holes.
I’ve been putting this off for weeks by finding other things to work on, but there’s not much left to be done until the holes are cut, so it couldn’t wait any longer. Obviously, I was nervous and still avoiding it – I spent an hour looking for a particular tape measure when another perfectly good one was on hand. After five hours of puttering around the shop I was so mentally exhausted I just gave up and dove in. Just shut the worry brain down, try not to think too much, and follow the steps.
 South, spun for access to the bottom
 Outline of the Case body, with centerline
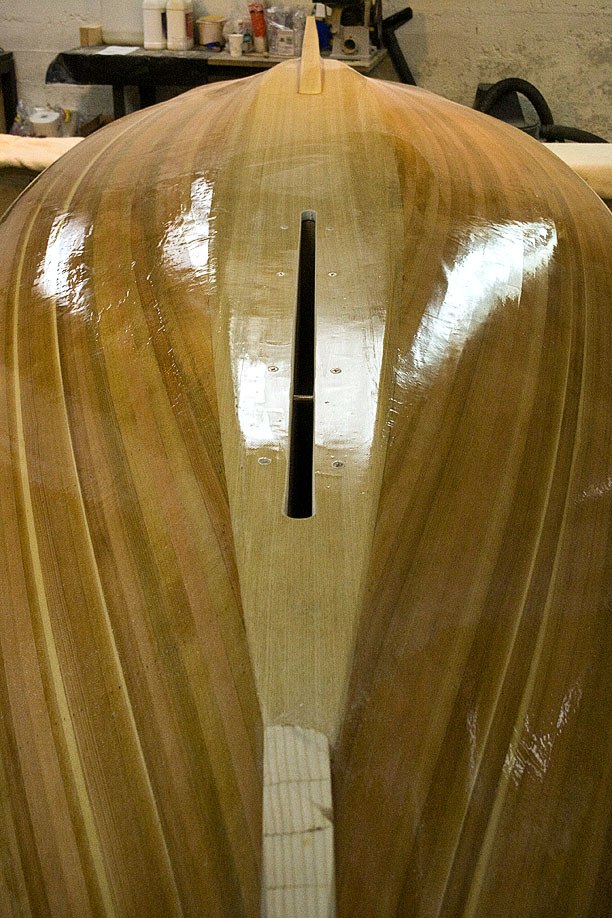
With everything lined up carefully, trace the outline of the case on the bottom of the hull, then draw a centerline down the middle of that. The opening of these cases is just over 3/4″, which is the thickness of the boards. Don’t try to cut the slot exactly to size. Allow for mistakes in measurement and draw a smaller 1/2″ box along the centerline, stopping about a 1/4″ short on each end of the final length. Hold your breath, and drill some 1/2″ holes along the centerline to provide access for a saw. Cut out the 1/2″ box. Relax, the worst is over.
 Rough cut slot, with pilot holes for screws
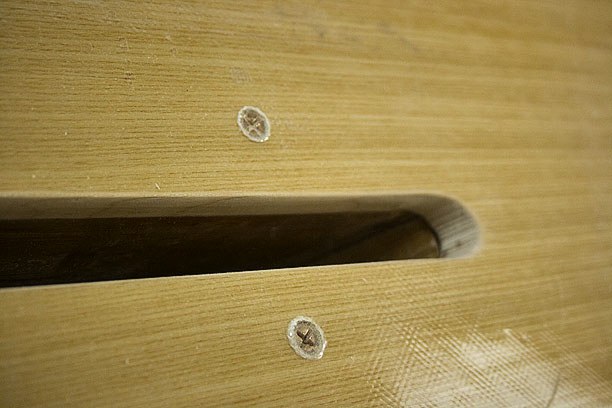
Mark locations for screws around the perimeter where they’ll bite firmly into the trunk logs, and drill small pilot holes. Put the assembled case in position, and from the outside drive two or three small temporary screws through pilot holes to hold the case in place. Drill countersink holes through all the others and drive in big bronze #12 screws, careful not to strip the heads. Remove the temporary screws and do the same with those holes. All screws should now be seated, with heads sunk just below surface level – you’ll cover these with epoxy later.
While the case is screwed down tight, use a flush cut bit on the router and trim out the slot exactly flush with the opening of the case. So they don’t get chipped off striking the bottom, round over the sharp exterior edges slightly, and angle back the trailing end of the slot. Sand smooth.
 Sharp edges rounded over slightly and sanded smooth
 Finished slot, ready for epoxy
Remove the screws and take out the case. Butter all connecting parts with clear epoxy. Be sure to fill all screw holes, allowing the raw wood to absorb all the epoxy it will hold. Then butter all surfaces with plenty of thickened epoxy and screw back together. Wipe off the squeezed out excess epoxy in the slot opening to give a smooth joint. Inside the boat, around the trunk logs, feather the squeeze out to a thin fillet for a good watertight seal.
 Fillets along the bottom for a good seal
Back away.
Rejoice.
Move on.
melonseed skiff, mellonseed skiff, melon seed, mellon seed


Excellent! No going back now!
Monday, June 14, 2010 – 04:22 PM
Yup, no kidding. That’s what makes it so scary! It is what it is, forevermore.
Barry
Wednesday, June 16, 2010 – 10:17 PM