Floorboards ready for varnish
Wow. That was hard.
Several people told me that this part was going to be a challenge. They were right.
The problem is there are no straight lines. Geometry – even tape measures – are of no use whatsoever. A terribly complex, odd shaped, 3D object has to fit snugly into another very complex, odd shaped, 3D object, and there’s just no easy way to accomplish that.
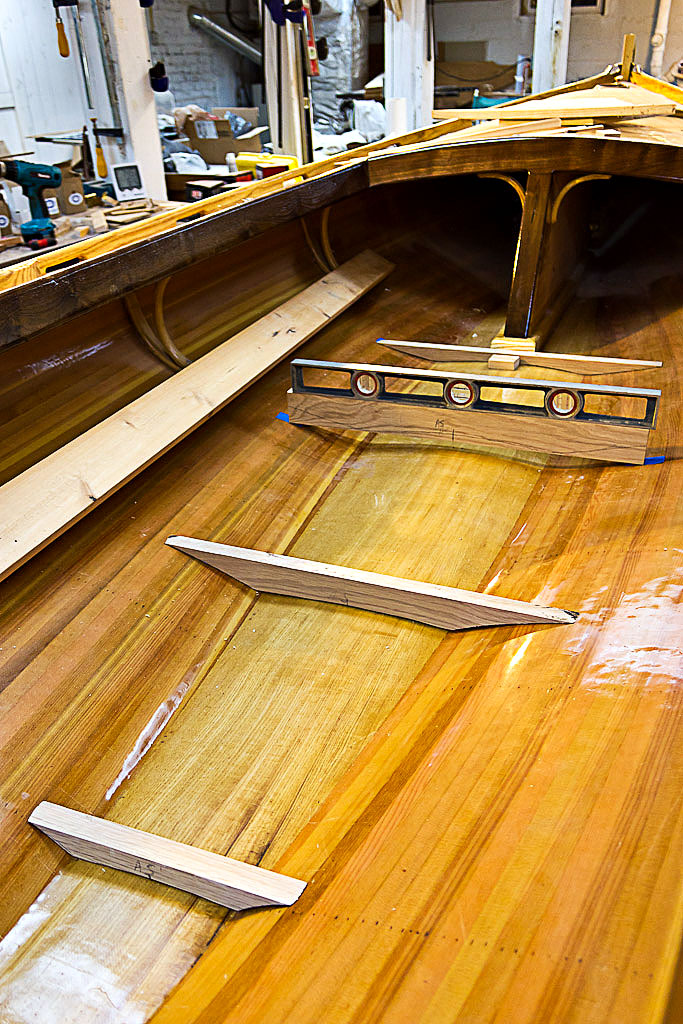
I’m sure there are other ways to do this, but I cut battens from strips of wood to fit at specific locations where the support beams would go. Then used a plank as a guide to trim them a little at a time until they lined up in a straight, flat plane. The planks actually need to run uphill at an angle to extend all the way to the back of the cockpit, so had to figure that in, as well.
I used a trick I learned from log cabin building to transfer the odd shape of the hull bottom to the floor beams. The board to be fit is cut to length and positioned above. Then, using a compass held perpendicular against the hull below, a line is scribed along the face of the board. This worked very well, and I got a good fit, mostly on first try, for every beam.
You can see by the curved bottoms of the beams that the keel plank isn’t flat. This is one of those effects from the humidity problem I had back when the basement flooded, before I realized it was a problem. It’s only .25″ out of truly flat, but is clearly visible here. The keel has a slight but smooth tunnel shape, something you’d have to work very hard to create intentionally, and I got it for free. Bonus! I’ll consider it a design feature, and will tell everyone it makes the boats faster and track true, like the hull of a Rescue Minor.
With the beams done, the planks can be fit, and this takes a bit of trial and error – test fit, trim a bit, test again.
Once the planks are shaped to fit, holes are pre-drilled and countersunk for screws and the whole assembly can be put together.
One of the things I wanted to do, but didn’t quite know how, was to figure out a way to lock the floors in place and easily remove them for cleaning and access to a drain plug. When you turn a boat over, as I have and will again, everything in the boat that isn’t tied down gets scattered by the wind and the waves. You lose most of it, and get yourself in more trouble trying to save it. You have too many other things to worry about (like trying not to panic) to have to worry about losing your stuff, too. Turning a boat back over is hard enough without the floors falling out and knocking you on the head or floating away.
I came up with a simple latch mechanism that seems to work really well, and it’s out of the way so won’t snag lines or stubb toes.
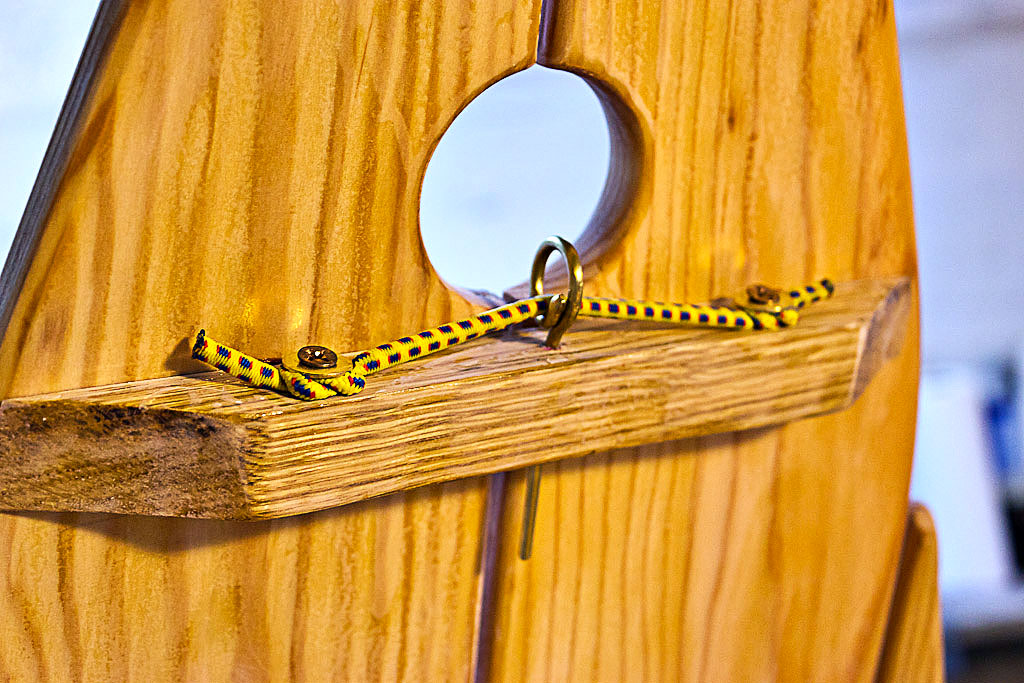
A U-shaped brass bracket is mounted on the keel plank, and cradles the rearmost beam. There’s a hole in one side of the bracket, and slot in the other. The beam has a corresponding hole through it, with a brass pin that slides through the hole. A piece of bungie holds the pin in place, keeps it from getting lost, and is flexible enough to allow the pin be disengaged.
A finger hole makes it easy to grab the floors and lift them out, and provides access to the pin latch. Pull the pin and the floors lift out. Two brass tabs on the centerboard case trunk logs hold the forward end down. Slide the floor deck under the tabs, lower into the cradle, and the pin snaps home to lock it in.
Most people oil the floors, and maybe I should have, too. Instead, I sealed every plank and beam first in epoxy, screwed them together using bedding compound, and will varnish them with Le Tonk like the rest of the boat. I’ll also run a bead of 3M 5200 along the bottoms of the beams to cushion the contact points against the hull, maybe reducing the wear and abrasion from long haul trailering.
Progress continues. Just down to details now. Looks they’ll be ready for their exit party. Think I’ll finish the rudder hanging rods so I can finally try out the tillers, and maybe put the names on so they can be properly introduced on Sunday.
melonseed skiff, mellonseed skiff, melon seed, mellon seed


I can tell you are having a great deal of fun figuring out the little details such as the floor brackets which usually are not included in plans. I too enjoy that aspect of a project. They really are looking great. Please don’t take this as me trying to rain on your parade, but be careful when the floors get wet as you can be sure they will be slick. I severely bruised or cracked a rib slipping on the shiny new borrom of Slip Jig (hummmmmmmm????)
If need a video platform at MASCF just know that I will make room aboard my boat to document your beautiful boats. See you in a little over a month!
borrom = bottom. I’m tired.
Yes, I’m a bit concerned about the slippery factor, too. Hence my hesitation. The Navigator seems just over the size threshold where standing up is a least tempting. These are below that, and I’m thinking most prudent movements will be on knees or all fours anyway. Time will tell. The Le Tonk is soft enough to give a bit of a grip. If that doesn’t seem enough when wet, it’s easy to rough up by rubbing sand into it. May do that on it’s own in short order, anyway.
If there’s a chance, I would love to get on Slip Jig, regardless (please!) If I can coerce a couple of other Melonseed sailors into taking these out, would be fun to see them across the water and get some shots and video. Thanks!
Ha! Just sent you an email about varnish vs oil before reading your blog and Kevin’s comments. Sounds like you are already on the LeTonk path, but you can always hit the tops of the boards with some coarse brass wool to put some tooth into it. Pretty much the same as oil.
Slick tab system. Cleaner than what I came up with.