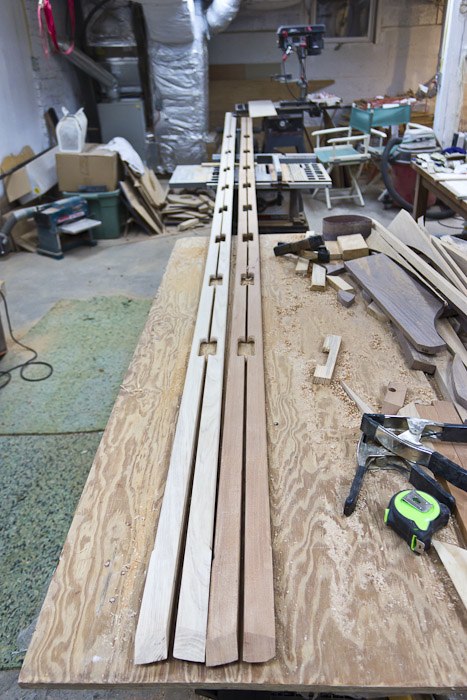
 Finished Toe Rails, ready to install
It’s good to be back in the shop again after two full months away from it. Got two full days of work done on the Toe Rails. They took every bit of it, too.
There’s more labor invested in each of these pieces of wood already than any other single piece on either boat. More cutting, drilling, sanding and whatnot than meets the eye. And there’s still more to be done. Must be why so many people decide to do without them.
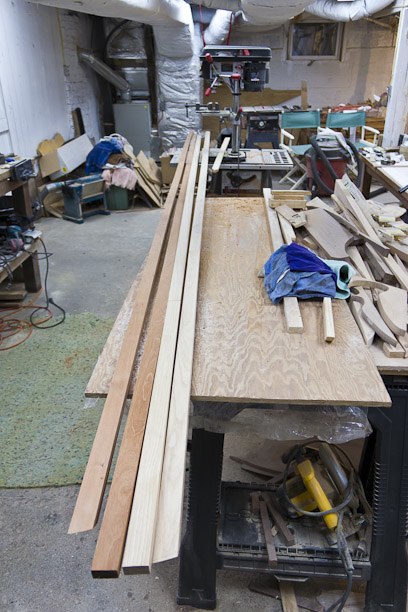
The blanks were scarfed up before the trip. While not the best scarfing job, they cleaned up pretty well in the planer. First order of business was to cut miters in the ends that join the stem. It usually takes several tries and a bit of fudging to get compound bevels like this right, so, by doing it now, all measurements that follow can work back from a known front end. The tail ends can trail past the transom and be cut flush later.
Once the spacing was worked out, I made a template to mark up the pieces for drilling and cutting.
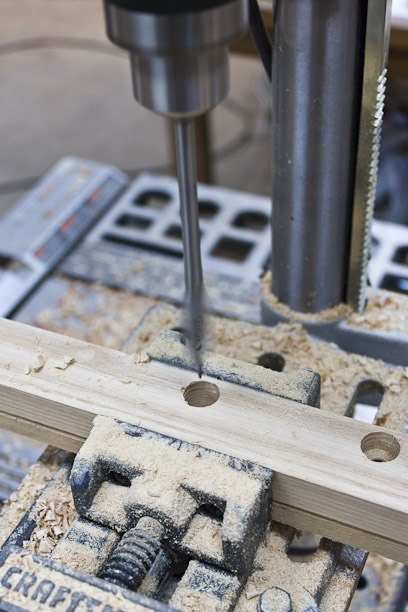
A jig on the drill press made quick and consistent work of the 64 holes needed. Seemed easier to do the drilling first, while the pieces were still square.
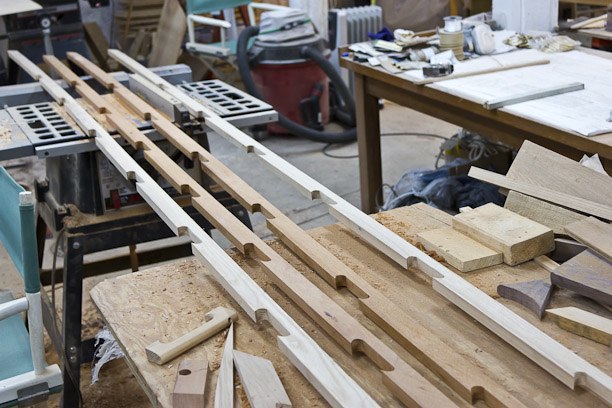
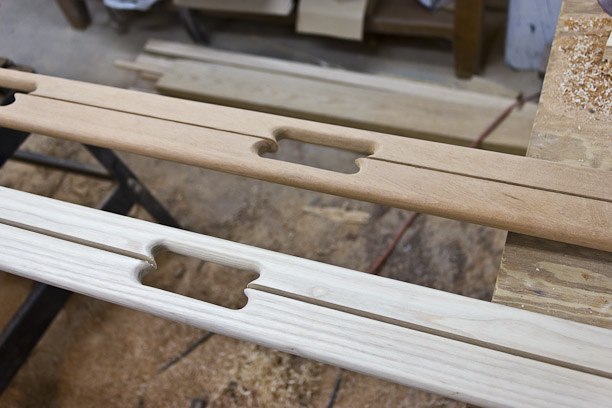
After drilling out all the scupper corners, bevels in the base and face were cut on the table saw, then the gap cut out with a jigsaw to get the rough scupper openings.
A router rounded over the top edges, and the insides of the scuppers, which helps, but the machine finish is pretty crummy. It takes hours of sanding to get a nice smooth contour and finish. Flat landing surfaces were left where bow chocks, oarlock risers, and transom joints fall. You can see that in the first photo at the top of the page.
Next is deciding where the mounting screws will go, then another 64 or so holes need to be drilled for pilot holes and countersinking, followed by Installation (which should be interesting, to say the least), and oarlock risers, and recesses for hardware. Jeez, does it ever end? Can we stop with the Toe Rail thing?
melonseed skiff, mellonseed skiff, melon seed, mellon seed







and building two at a time seemed like a good idea at the time. Keep going, you’re almost there. Dave
Monday, May 9, 2011 – 09:25 PM
Thanks, Dave. Two at a time is still better than one after another, but the cruel irony is the closer you are to done, the longer everything takes.
Thursday, May 12, 2011 – 12:18 PM
Hey, I know this is an older post but I am about to embark on the same journey. I have a question (on the off chance you see this)… It looks like you cut everything into a straight plank. Did you bend the wood into shape? How did that affect the angles of your miter cuts?
Thanks.
Jason
Hi Jason,
The curve is gentle enough it didn’t need to bend it first. But, because the rails would bend more at the scuppers where the wood is thinner, I “trained” the wood to bend before I cut the scuppers to I’d get smoother curves.
First I cut the rails to the rough dimensions, planed to thickness, then ripped the angle I wanted at the base for the deck joint while the boards were nice and straight. (I left them long and cut off the excess flush at the stern after mounting)
Then I bent them around temporary forms ,close to the same curve, a little overbent, and left them for a couple of weeks while it did other things. The fibers slowly stretch/compress. They springs back almost straight again when you take them off the form, but the wood remembers that shape. After cutting scuppers and final shaping, they went back to the proper curve relatively easily, with only minor bumps at the scuppers.
I started fastening at the front, using ratchet straps to cinch them into exact place as I worked my way back. This left my hands free to work the drill and screws and move the piece as needed.